

屈服:Yields one 9-inch cake.
Servings:twelve.
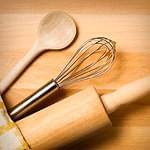
The simplest way to decorate this cake is to press chopped, toasted walnuts onto the sides. For a more dramatic look, try wrapping the cake in a chocolate band (see ourvideofor how-tos) and topping it with white chocolate curls.
亚搏手机版官方
For the chocolate cake:
- Vegetable oil or pan spray for the pan
- Flour for the pans
- 6 oz. (1-1/2 cups) cake flour
- 1 oz. (6 Tbs.) unsweetened natural cocoa powder
- 2茶匙。发酵粉
- 1/4 tsp. baking soda
- 1/4 tsp. table salt
- 1 cup granulated sugar
- 1/4 cup vegetable oil
- 1 large egg
- 2茶匙。pure vanilla extract
- 1 cup water
For the mousse:
- 2 cups heavy cream
- 3/4 oz. (1/4 cup) unsweetened natural cocoa powder
- 13 oz. bittersweet chocolate, chopped
- 4盎司。(1/2杯)无盐黄油,在室温下切成小块
- 2茶匙。pure vanilla extract or 1 to 2 Tbs. brandy or Cointreau
- Pinch table salt
- 7 large egg whites, at room temperature
- 1/2 cup granulated sugar
For decorating the cake:
- 7 oz. (1-1/2 cups) walnut halves, toasted chopped medium-fine
- 或者6 oz. bittersweet chocolate, plus a 10- to 12-oz block of bittersweet, semisweet, milk or white chocolate
Preparation
Make the cake:
- Position a rack in the center of the oven and heat the oven to 325°F. Lightly grease a 9×2-inch round cake pan, line the bottom with parchment, and flour the sides (but not the bottom).
- 将蛋糕粉,可可粉,发酵粉,小苏打和盐分筛入大碗。加入糖并搅拌直至充分混合。将油测量为1杯液体测量,加入鸡蛋和香草,并与叉子混合以混合。将卵油混合物加入干成分,然后加水。亚搏手机版官方搅拌直至干成分湿润,大约1分钟,将碗的侧亚搏手机版官方面刮下。将面糊倒入准备好的锅中。
- 烘烤,直到插入蛋糕中心的选片干净为32至34分钟。在架子上冷却20分钟。轻轻油脂,将蛋糕倒在上面,从锅上抬起,剥下纸,然后使蛋糕完全冷却。
做慕斯:
- Set up an ice bath by partially filling a large bowl with cold water and some ice.
- Combine the cream and cocoa in a large saucepan set over medium heat. Bring to a full boil, whisking occasionally to blend in the cocoa. Slide the pan off the heat and immediately add the chopped chocolate and the butter; whisk slowly until melted and smooth.
- Scrape the chocolate mixture into a large bowl. Add the vanilla and salt. Set over the ice bath and stir constantly with a rubber spatula, scraping the sides very frequently, until the chocolate cools to room temperature (don’t stop stirring or lumps will form) Remove the bowl from the ice bath.
- Put the whites in a large clean bowl. Whip with an electric mixer on medium-low speed until very foamy. Increase the speed to medium high and beat until the whites form very loose, soft peaks. Slowly add the sugar. Continue beating until the whites are shiny and form floppy peaks.
- 快速工作,将大约三分之一的白色sc到冷却的巧克力混合物中,然后用橡胶刮刀或搅拌折叠直至混合。将剩余的白色刮入巧克力中,然后轻轻而彻底折叠。将大约1杯慕斯so放到一个碗中,盖上盖子,然后冷藏以完成修饰。用其余的慕斯组装蛋糕。
To assemble the cake:
- Set the ring of a 9-inch springform pan on a large, flat cake plate. To cut the cake into layers, it helps if the cake is slightly chilled. Set the cake bottom side up on a parchment-lined work surface. Cut into three equal layers. Set aside without separating the layers.

- 轻轻将顶部蛋糕层(实际上是底部)倒置,并将其置于弹簧环中,以便慕斯可以流过边缘以磨损侧面;小心地处理蛋糕(如果破裂,只需将其拼凑在一起)。将慕斯(堆满2杯)的大约三分之一sc到戒指的蛋糕层上,然后轻轻散布到盖上。将慕斯顶部的下一个蛋糕层(中心)翻转,并在必要时轻轻按一下。将剩余的慕斯的一半铲在整层上,然后轻轻散开。将剩余的蛋糕层倒置,然后将其放在慕斯的顶部。轻轻按一下以平整它。在剩余的慕斯上铺开并使顶部平滑;蛋糕应该填充戒指(如果一点摩丝从底部泄漏出来,请不要担心)。

- 如果您用坚果装饰蛋糕,请在蛋糕的顶层中添加足够的慕斯,因此它可以触及Springform戒指的边缘。用金属刮刀或长刀的平坦,直的边缘使顶部平滑。将糖霜梳子或长长的锯齿刀拉到慕斯,形成波浪状。如果该图案不满,则将蛋糕弹出5到10分钟的间隔,以便慕斯开始设置,然后重试。(如果您用巧克力乐队包裹蛋糕,请跳过此步骤)将蛋糕放在冰箱中至少6小时,最多24个小时。
To decorate:
- 从冰箱里取蛋糕。在热水下运行一把长刀或金属刮刀,然后将其干燥。滑动蛋糕和戒指之间的温暖刀,将刀压在戒指上,使蛋糕松开。小心释放弹簧扣;轻轻撬开它。抬起戒指,清洁板边缘。如果您要用坚果装饰蛋糕,请在蛋糕盘周围进行箔纸条,以保持其清洁。
- 如果蛋糕的侧面有裸露的斑块,请使用一个小的金属刮刀用一些保留的慕斯来修饰它们。冷却蛋糕。
- To decorate with nuts: Scoop up a handful of the walnuts in one hand and pat them onto the side of the cake. Many will fall off but you’ll be left with a single layer of nuts. Repeat, rotating the cake to cover all the sides.
- To decorate with a chocolate band, follow the method demonstrated in thevideo.
- Once decorated, keep the cake refrigerated and serve it within 8 hours. Remove from the fridge 10 to 15 minutes before serving.
Tip
如果您担心未煮过的蛋清,则可以使用巴氏杀菌的蛋清产品,例如白色。
Reviews
Rate or Review
Reviews (10 reviews)
-
 ellencanada|12/06/2019
made it. was delicious. absolutley the best homemade chocolate cake ever. furthermore, the mousse was rich, decadent and not overly sweet. excellent.
-
AMJSunshine156|01/31/2017
? ?OMGOSH ! !我们发现我们最喜欢的CHOCOLATE MOUSSE dessert!!!! This is the MOST YUMMY & SCRUMPTIOUS dessert EVER!!!! It melts in your mouth & satisfies your chocolate craving soul - no joke!!!!I've tried a similar dessert in a local French pastry bakery, which unfortunately closed since. So when I found & made this dessert, which is 100 times BETTER than the French pastry desserts, we were in HEAVEN!The steps may seem to be overwhelming BUT, as other bakers have stated, very manageable even for the novice baker. If you don't want to deal with making the cake part, just follow the easy recipe for the mousse, which is the pice de rsistance (or the masterpiece of the dessert).Trust me, this dessert is WELL WORTH going through ALL of the steps if you love chocolate &/ chocolate mousse.
-
thehenwen|12/27/2013
This cake was not easy to make, but with careful planning and enough time it's doable. I made the cake in the morning on day 1, and let it cool until late afternoon. It didn't rise as much as I had hoped, and it also was domed which made it difficult to cut into three layers but I managed to do it, just. The mousse went well and was delicious. I assembled the cake and put it in the fridge overnight to set. The next morning I made the chocolate band. You definitely need to watch it carefully as I let mine set up a bit too much so I couldn't ruffle it as much on the top as I should have without it cracking. Instead of chocolate curls on top, I sprinkled edible gold flakes. As I had made sure to smooth the mousse on top very carefully, it looked great and together with the chocolate band it looked really impressive!Taste-wise, I'd give the mousse an 8 or 9 as it wasn't very complex in flavour, but the cake itself was a bit dry. There was enough mousse that it didn't really matter, but still, I would've liked it better had the cake been more moist.
-
frutaz1|03/28/2011
I have been making and decorating cakes for a few years but this was the first time i ever made mousse. You really need to set up your work space ahead of time, the cold water bath, the beaters, warm up your eggs, etc. Do as much prep work as possible before starting, otherwise you will be yelling for help at a crucial moment like I did. First try, my eggs wouldn't fluff so I read that you should make the eggs room temp, not get ANY yolk in the whites, etc. I started over and they it was perfect. This was not a simple recipe, but now that I have done it once, I know how to do it and it will seem way easier next time around. This is a great option to do in lieu of chocolate ganache which uses way more actual chocolate and cream and is pricier. I also decorated mine with chocolate curls on the sides, and huge, fresh strawberries on top which I drizzles with chocolate. All that said, this was THE best tasting cake I have ever made. It was the perfect texture, sweetness, presentation, etc. I can't say enough good about it. Highly recommended and well worth trying to figure out how to do it.


写评论